Canva Designs – Guide to create a stunning “Out of the Box” Design
Let's break your design out of the box!
Having an element "break out" of another is a great trick to create visual interest in your work. It subtly subverts expectation and offers a small visual surprise to the viewer.
To achieve the affect, all you'll need is:
- An image of an object / person without a background (PNG)
- A shape to break out of (square is by far the easiest)
If you can't find an image to use without a background, there are a couple ways to edit one yourself.
Getting an image without a background
First, consider removing the background from your desired photo using a mobile app. Image editing applications on mobile have become very featured packed these past years. There are many great options for free / cheap to consider:
If you prefer to use a computer, you don't need to pay for expensive applications. Paint 3D on Windows has a great featured called "Magic Select" for this purpose. It allows you to outline the object you want and remove the background.
On a Mac the built in Preview app allows you to select an area to cut out. You can achieve this with the Instant Alpha Tool, Lasso Tool or Smart Select tool. (ensure the Markup bar is showing).
There are also many websites online that will remove the background automatically. Be warned, most do need a paid subscription to download full quality versions. One such option that will allow free downloads of reasonable quality is www.remove.bg
Preparing the image
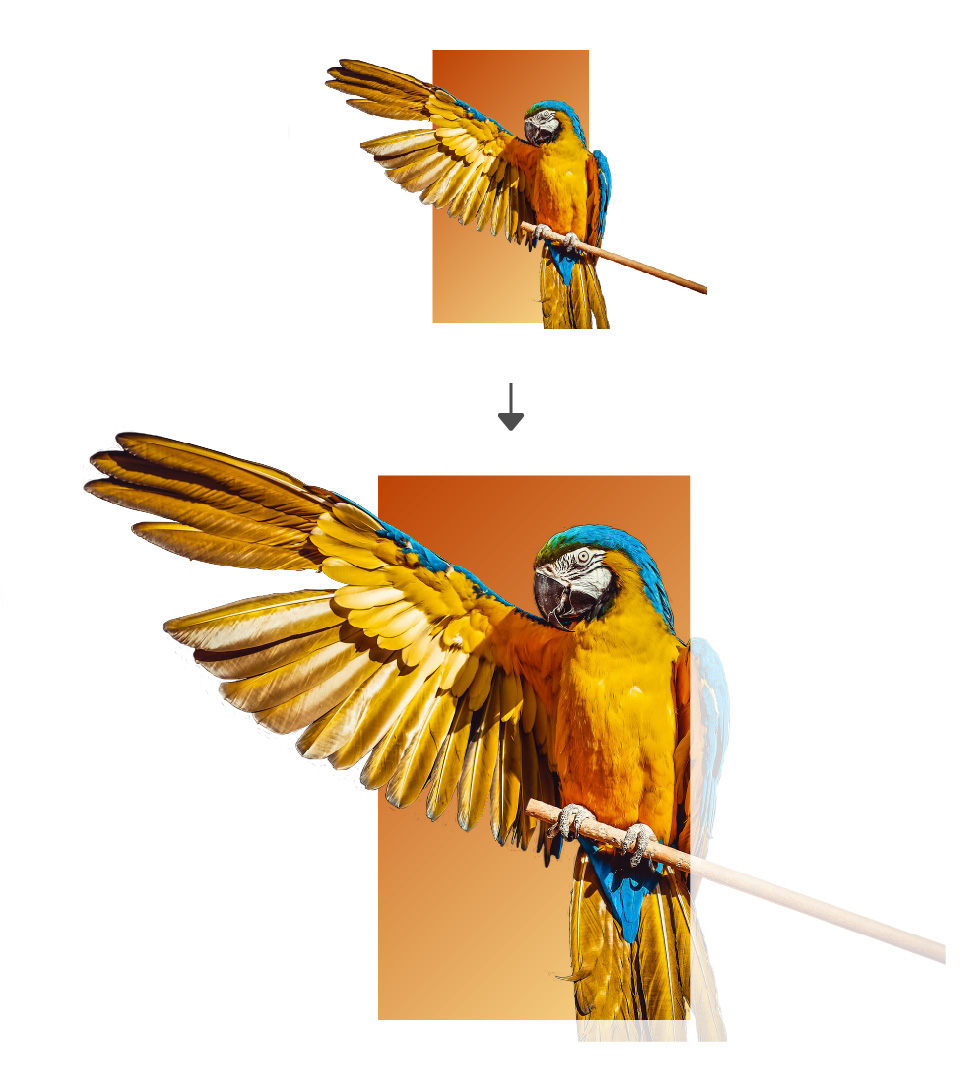
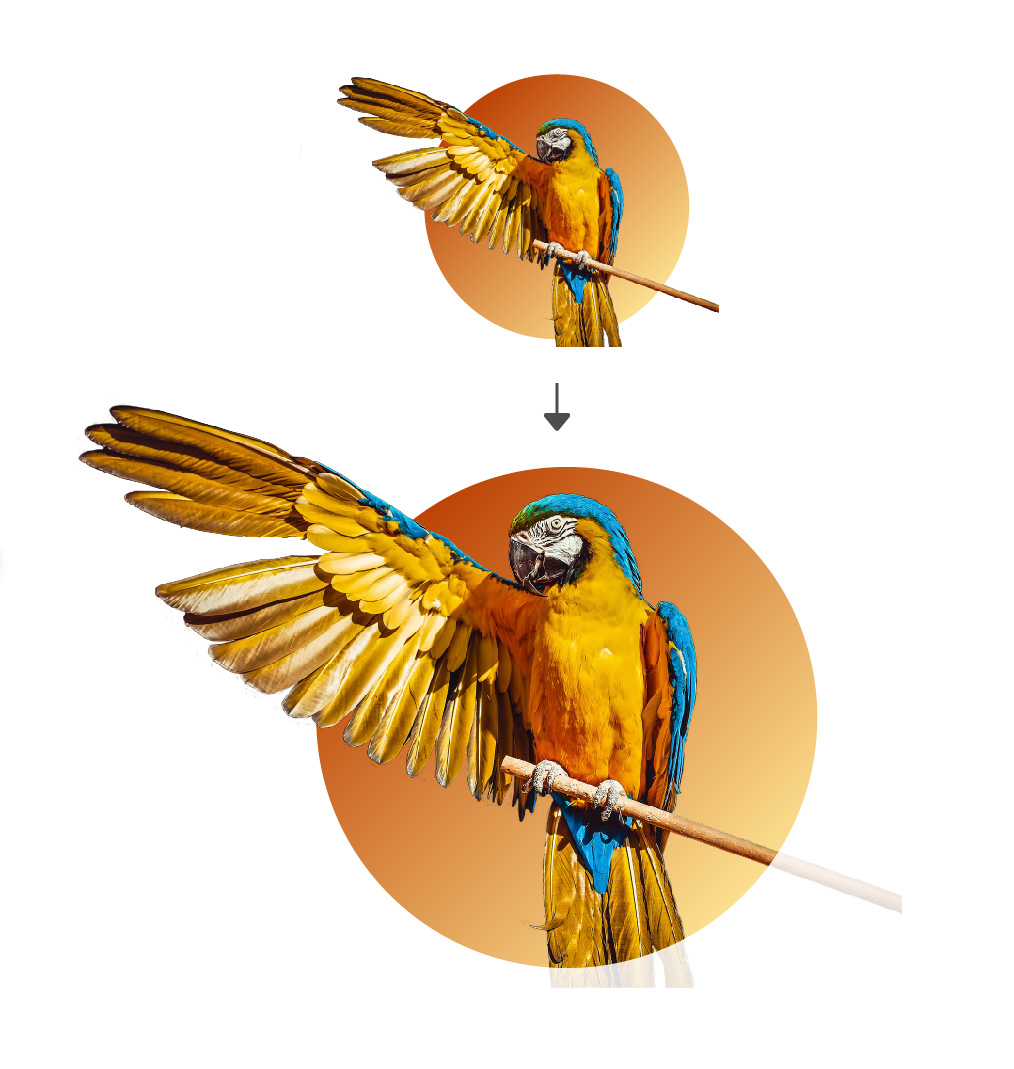
Once you have your image, we need to prepare the effect of it breaking out of our shape. It helps to think of the image as if it's in physical space. How would this object "come out of" the shape we're using? The image needs to be cut-off to match some part of the shape to appear as if it's stepping out of it.
For a square, this would include cutting off the image on 1 to 3 sides to snap to the edges:


For a circle, you would need to cut off the image with the same curve of your circle for some amount of the photo. (This requires some more advanced tools / editing abilities).


The image is now ready, and it's only a matter of placing it within our desired shape, and positioning it in our design.
It may feel like a more advanced design, but as you can see with only a couple steps you can easily achieve it!
Cheers to your next "breakout" design!
